

🔥
3d •
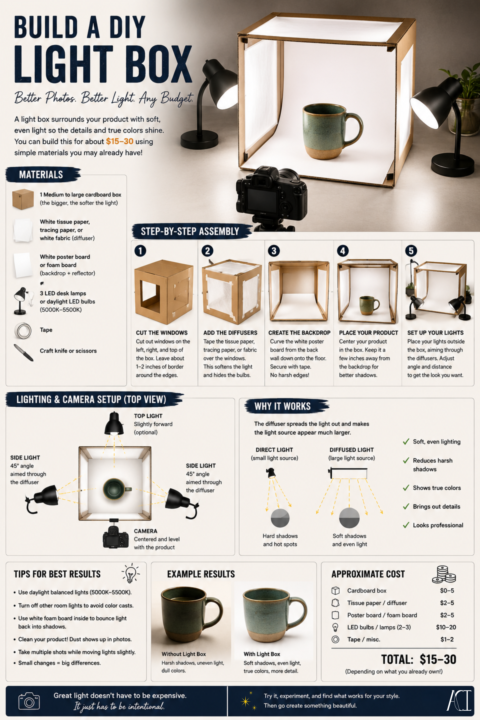
DIY Lightbox~!
If you’ve ever looked at professional product photos and thought, “I could never afford that setup,” here’s some good news. You probably can~! One of the best investments for photographing small artwork, candles, jewelry, ceramics, stickers, soaps, and handmade products is a simple DIY light box. You can build one with things you may already have around the house: 📦 A cardboard box 🤍 White poster board or white foam board 🧻 White tissue paper, tracing paper, or white fabric 💡 Two or three LED desk lamps or daylight LED bulbs ✂️ A craft knife and some tape The idea is simple. Instead of pointing bright lights directly at your product, you shine them through the translucent sides of the box. The material diffuses the light, creating a much larger light source. Larger light source = softer shadows. Softer shadows = cleaner, more professional-looking product photos. A few extra tips: • Use bulbs that match in color temperature (around 5000K–5500K works well for daylight). • Turn off other room lights so they don’t introduce different color casts. • Use white foam board inside the box to bounce light back into darker areas. • Clean your product before every shoot~ you’ll notice dust far more in photos than you do in person. • Take several photos while moving the lights slightly. Even a few inches can make a surprising difference. Remember: You are not trying to make your product look different~! Strive to make it look like it does in real life on its very best day~! Sometimes a $20 DIY setup and an understanding of light will outperform hundreds of dollars of gear used without intention. Have you ever built your own light box? If so, I’d love to see it in the comments!

Apr 29 •
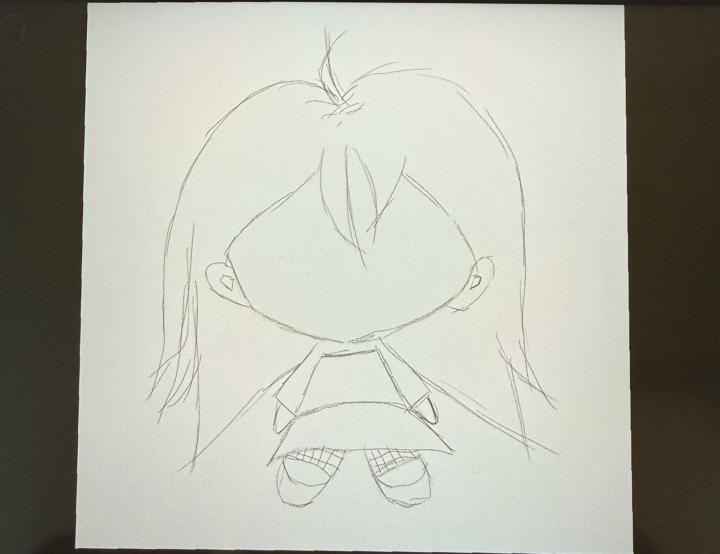
Sketch to digital
Worked on this digitally today! I tried simplifying the shapes and cleaning up the lines. I did remember to flip the canvas this time and used liquify a bit which actually helped! I’m still figuring out what feels right though. Does anything look off or weird?

Mar 16 •
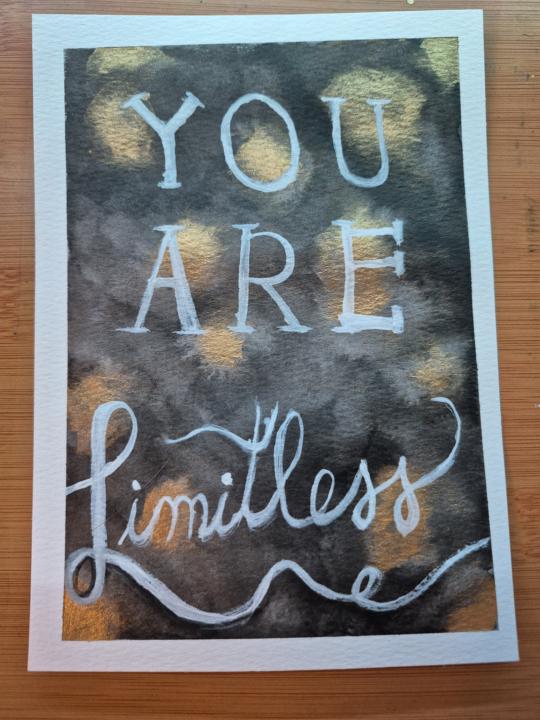
Motivation monday
One of my favorite authors posted a voice note to her broadcast channel last night and something she said spoke to me. I decided to paint it. With the world being what it is today, finding pockets of joy and peace are so important. So here is a reminder from my heart.
Feb 9 •
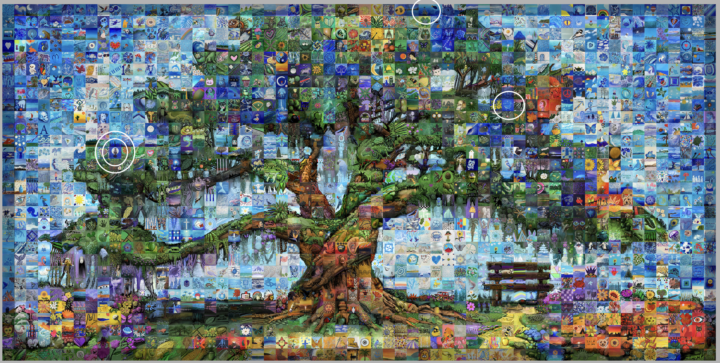
Mural Mosaic Project
While not my personal project I have participated. It is a fun challenge. They send you the 6x6 canvas and a limited palette depending on where they plan to put you in the mural. After that, it's all you. Some months later your painting is turned into a tile and added to the mural. I've circled my three. Here's the link if you want to get your art up in a public place and support -https://register.muralmosaic.com/
Feb 11 •
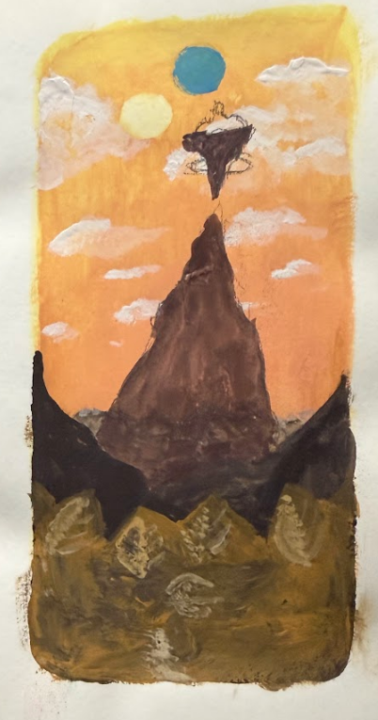
Before and After ✏️
We love a stunning final piece… but can we talk about what comes before it? The thumbnails.The messy sketches.The color studies.The “what if I try this instead?” moments. Preliminary work isn’t just prep it’s problem-solving. It’s where composition gets stronger, values get clarified, and ideas evolve from vague sparks into intentional design. Planning before the final piece often means fewer frustrations, bolder decisions, and more confidence when it’s time to commit. Sometimes the “before” stage is where the real magic happens. Let’s talk about it: Do you create thumbnails or value studies before starting a final piece? Has planning ever completely changed your original idea? Or are you more of a dive-in-and-figure-it-out artist? Drop a before & after in the comments if you have one, sketches included. Let’s normalize showing the process, not just the polish. 👏 For my before and after this is my "Floating Cities on a Distant Planet" piece. My preliminary is in gouache in my sketchbook to study colors and composition. The final is mixed media with acrylic, gouache, and fine liners! As you can see, the concept shifted quite a bit from the preliminary sketch to the final painting. What began as mountains evolved into expansive gas clouds, which opened up the composition and gave the piece a more atmospheric, otherworldly feel. I also introduced a second floating city in the distance to create more depth and narrative interest. Instead of a traditional cloudy sky, I opted for cloud rings, which added movement and a stronger sense of scale. It’s a great reminder of how much can change between planning and execution, and how staying open during the process can lead to a more dynamic final result.
1-28 of 28
powered by

skool.com/theartcollectiveinternational-5768
A welcoming home and hub for artists, creatives, and curious minds to learn, create, share, and grow together.
Suggested communities
Powered by