Activity
Mon
Wed
Fri
Sun
Aug
Sep
Oct
Nov
Dec
Jan
Feb
Mar
Apr
May
Jun
What is this?
Less
More
Memberships
Creative 3D Community
6.9k members • Free
183 contributions to Creative 3D Community

4d •
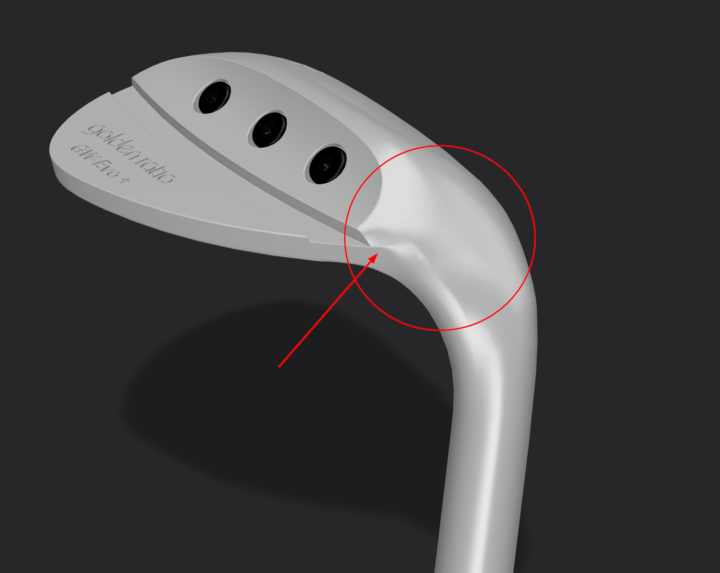
How would you approach this?
I'm building this Golf Head, and I'm having a bit of trouble trying to figure out how to best tackle the arching neck. You can view the model here: https://share.plasticity.xyz/r/jMdMTXqbBiAZA79PT2dsiibsvK6PPVVXw4yhM0He4nI Any and all tips & advice on how I could improve this area would be greatly appreciated! A "Draw Over" image on how I could improve the Edge layout would be very helpful! Thanks all!

1 like • 4d
I don't know show looks the original. But I think the main problem with this big patch. It looks unnaturally dented. I would try to split it in half. However it hard to do with all this fillets and cutting. You should work with first main form
1 like • 3d
@Ken Bock Probably split like this (green). However I would started to fix before all fillets and cut details (red). At least fillets. The best strategy to model from bigger to smaller chunks of surface. Otherwise curvature become to sensitive and less controlled
6d •
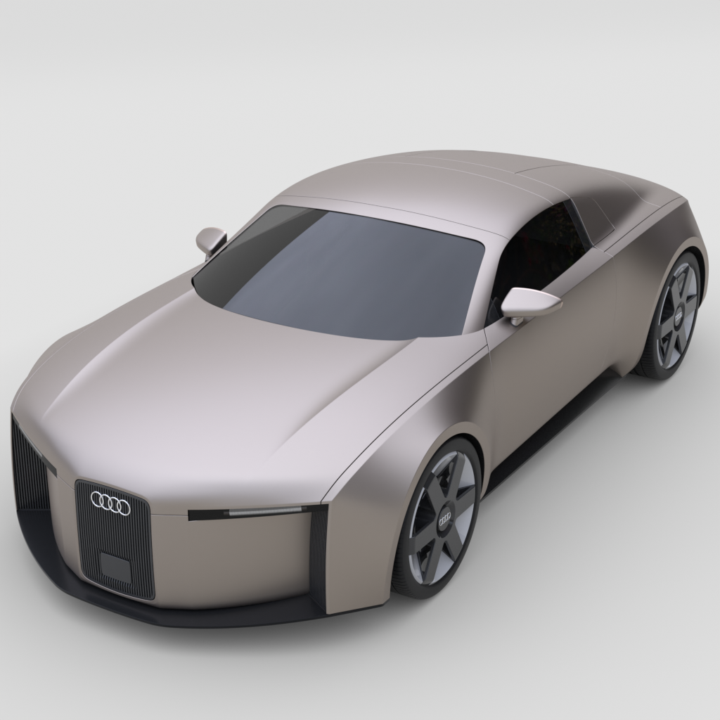
Audi Concept C
One more tutorial from Kuechmeister Swagger. Not so detailed and complex shaped as Audi E-tron however a bit faster as easier to follow. Model does not 100% correspond to original because of lack of correct blueprints and surface quality is not perfect in several places but still quit close. I would recommend the course to advanced users who want to practice Surface tool and XNurbs with different cases of usage. But keep in mind the tutorial is kinda incomplete. I mean there are some details I had to added myself from photo references so the car looks whole: black plastic grid in the front, logos, mirrors didn't corresponded to reference, bottom part absence and holes near wheel housings. The most handy references I found here https://www.netcarshow.com/audi/2025-c_concept/ Shared model: https://share.plasticity.xyz/r/1d5zp3nhkpgS_XPjG80kzYF-A8ZCAQYoSQC4ug_rqnU
2 likes • 6d
@Andy Varewyck Thank you. And happy modelling :). Despite the fact E-tron is harder it was much more fun to make

14d •
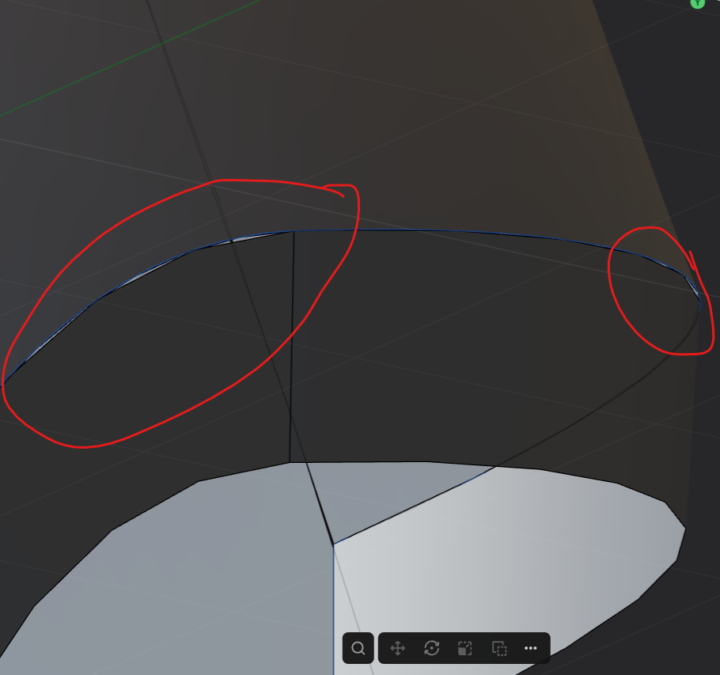
tear in geometry when sweeping
hello when attempting the helmet tutorial im getting a tearing effect or essentially the sheets arent merging properly. at first glance it looks ok but when zoomed in its not connected. any know a fix!!??
1 like • 14d
Looks like a visual artefact because of low tessellation precision. If you join these surface it should disappear. Any way surface looks too rough. One of the reasons is scale. Probably your model is too small. It's just guess, without plasticity file nobody could say for sure
14d •
G2 curvature intuition (kinda tutorial)
G0-G1-G2 curves/surface connection is the topic you have to understand from the very beginning of modeling practice in Plasticity. There are 3 things you have to keep in mind when you relate end points of 2 curves: 1) position 2) tangent line 3) curvature G0 is when these points have only common position (just connected) G1 is 2 of them: position+tangent (connected and aligned) G2 is all 3 at the same time: position+tangent+curvature (connected, aligned and ... what?) Nikita gives sufficient explanation to understand general idea: G0 - is not smooth, G1 - is smooth with tangents alignment, G2 - is even more smooth. Any way you can check smoothness of surface with black/white zebra. However I wasn't satisfied and would like to be more precise. Curvature of a smooth line at a point is the reciprocal of tangent circle's radius at this point. Namely: Curvature = 1 / (radius of tangent circle) G2 is when connected curves at their end points have equal tangent and curvature or (what is the same thing) their tangent circles coincide (or reflected). For surfaces the definition is almost the same: just replace circle with sphere. This definition also explains why mirrored surface with only G1 on the edge is enough to make G2: mirror gives the same surface with the same curvature You can test it in Plasticity (with a small error) by drawing a circle from 3 points very cloth to an end point. With G2 bridge you'll get almost coinciding circles. In contrast G1 produces circles with different size in most cases. In attached video there is an example how it works. Luckily you don't need to bother yourself with these technical details to model high quality stuff. There is a Curvature Toggle for curves end Zebra shader for surfaces to check curvature. But sometime it's interesting to know what is "behind the scene" :)
0
0


18d •
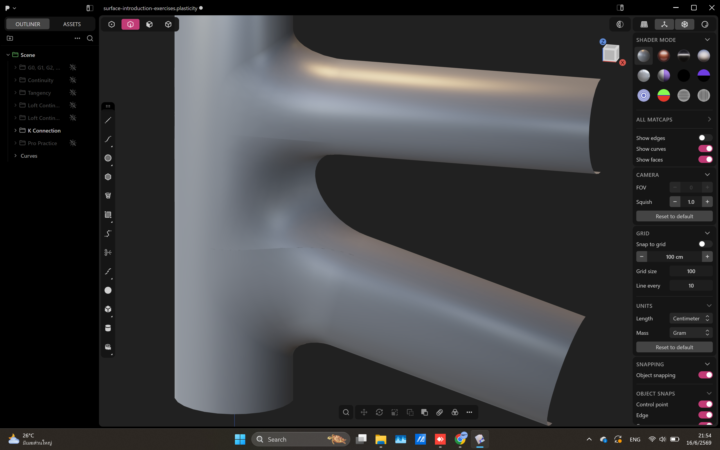
i need help
hello, i am a beginner. I just start the topic on Industrial Design - Power Tool. I still learning on the introdcution section. I got stuck with K-connection (picture 1 and 2) I tried to patch everything follow the tutorial but it was not smooth, lt left the gaps like this. What should I do? every line is G1, I dont know how to fix it. Second, on the 3rd picture, I was on the 07-Pro practice section. I dont know why when I bridge the line, the line become like that. I want it to curve equally (sorry, english is not my mother tongue) I don't know how to explain it. why it curve like that. Thank you in advance to people answering. I am here learning and practicing on my free times after work.
0 likes • 15d
1 & 2 pictures - it better to attach plasticity file to find exact problem. On the last picture two hole are not equal so bridge is not symmetric as expected
1-10 of 183
Active 7h ago
Joined Nov 24, 2024
Powered by