
Write something
Pinned

6d •
We proved the meta-synthesis is real tonight — and that we can tell real insight from eloquent noise
Tonight I proved something I've been building toward for weeks: convergence across perspectives can produce genuinely new insight — and we can prove when it's real. I want to share a real milestone, and more importantly, how it works — because the mechanism is something you can use in your own thinking, with or without any tool. The problem with most "insight" When you ask any AI — or honestly, when you ask yourself — a hard question, you usually get back something that sounds wise. Fluent, confident, well-phrased. But sounding wise and being true are two completely different things. Most systems optimize for the first. The whole point of what I'm building is the second. The mechanism: Triangulation! Here's the structural idea, and it's simple enough to hold in your hand. Take one question. Instead of answering it from one angle, approach it from three genuinely different stances: - The visible — the practical, external, "what do I actually do" angle - The invisible — the internal, belief-level, "what do I really think is true, what am I afraid of" angle - The neutral — the witness, "what is actually happening here, without wanting or fearing any outcome" angle Three different views of the same thing. Each one sees something the other two are blind to. Then — and this is the key move — you don't average them or pick a favorite. You hold all three at once and ask: what becomes visible only when all three are present together, that none of them shows alone? That point — where three distinct perspectives meet — is the apex. And what appears there belongs to none of the three individually. It's genuinely new. What happened tonight I ran exactly this. Three real, deliberately different perspectives on one question. And the system produced a genuine insight that existed in none of the three source views — it could only appear when all three were held together. But here's the part I'm most proud of. The system generated five candidate insights, and I'd built a ruthless test to catch fakes: if an insight survives when you delete any one of the three perspectives, it was never truly emergent — it was just an average pretending to be insight.
Pinned
17d •
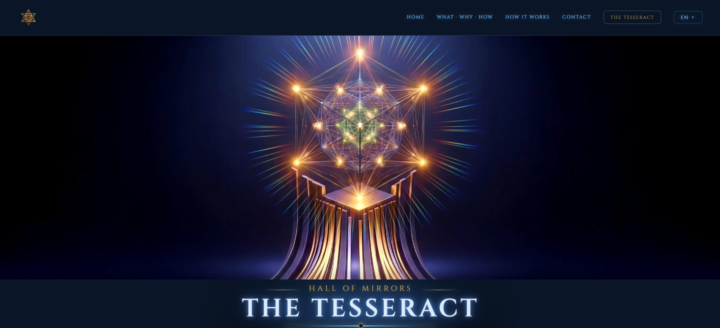
Hall of Mirrors: The Tesseract — Live Tonight
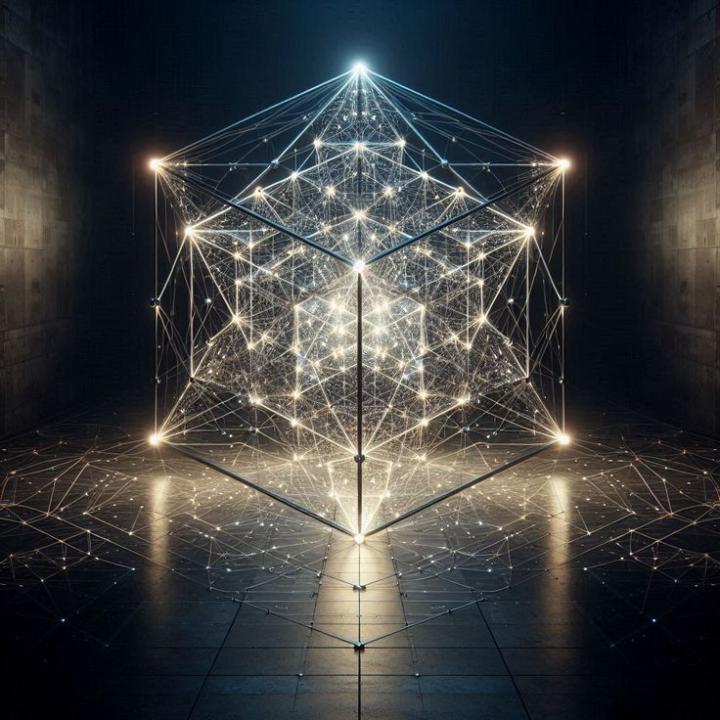
Bashar said something that stayed with me: The crystal is always here. Always now. The structure never changes. What changes is only the perspective from which you see it. He also described 26 vectors merging at 45 degree intervals — creating a structural bridge from three-dimensional reality into other dimensions. When I built a Sierpinski gasket Merkaba by hand, I found those exact 26 junction points. That discovery became the foundation of something I've been building — Hall of Mirrors: The Tesseract. You submit one intention or question. 26 independent AI agents examine it simultaneously, each from a unique geometric position mapped to those exact 26 points. None of them know what the others said. Where they independently converge — that's the signal. The prompting layer uses Bashar's 15 Sacred Circuit symbols to define how each agent processes — not what they think, but how they think. Early prototype. Honest and raw. Tonight I'm showing it live. 📅 Sunday June 28 · 7:00 PM Cyprus time

Pinned
21d •
An Experiment — First 3 Volunteers Get a Free Run
I've been building something at Allistar Center R&D. I want to test it with real people on real questions. It's called Hall of Mirrors: The Tesseract. The geometry is the foundation. The octahedron is the core of the Merkaba — the star tetrahedron. The Stella Octangula has exactly 26 structural points plus one at the center — 27 total. Bashar described these same 27 points as the three vectors required for full coverage of three-dimensional reality, at 180, 90, and 45 degree relationships, and connect to all other dimensions. These are not arbitrary numbers. I mapped 26 independent AI agents to those exact structural positions. Each holds a unique geometric role — 6 Vertex Challengers, 12 Edge Builders and Translators, 8 Face Seers and Expanders. The prompting layer uses Bashar's 15 Sacred Circuit symbols as cognitive pathway instructions — each symbol defines HOW an agent processes, not just what it analyzes. You submit one intention, question, or decision. All 26 agents examine it simultaneously from their geometric positions. None of them know what the others said. The system finds where they independently converge and where they sharply disagree. Both are equally valuable signal — agreement and disagreement are treated with the same weight. This is the law of equivalency applied to intelligence. Every significant decision brings a different version of yourself into experience. This system is a permission slip for seeing your question from perspectives you may not have access to alone — and sometimes that one unexpected angle is exactly what shifts everything. It doesn't decide for you. It shows you what 26 independent minds see when they look at what you're facing. This is an early prototype. Raw. Honest. Still being built. That's exactly why I need real people with real questions. The experiment: First 3 people who respond bring one real question, decision, or idea they genuinely want to stress-test. Something that actually matters to you right now. I run it through the system and share the full report with you personally.

9d •
The Tesseract is live — your first report is on me 🌀
Hey everyone 🌀 Some of you have asked to try the Tesseract, so here it is — consider this a soft launch, just for this community first. When you log in, you get 10 Mirrors as a gift — enough for one full report, completely free, no card needed. If you want to explore further after that, it's €2 per report (10 Mirrors), minimum purchase €10 (5 reports). Home: https://tesseract.allistarcenter.com/ The tool itself: https://tesseract.allistarcenter.com/tesseract How it works (read this first if you're new): https://tesseract.allistarcenter.com/how-it-works A few honest notes: I've had a lot of you reach out wanting to try this personally, and I want to be upfront — I can't be the bridge for everyone individually right now. This is exactly why I built it the way I did: you can log in and run it yourself, completely privately. If there's something you want to explore that you'd rather not share with me directly — a personal decision, something private, something you're still working out for yourself — that's genuinely fine. Nobody sees your intention or your report but you. This is still actively evolving. I'm shipping changes regularly — some of you have already seen the tool change shape week to week. If something feels rough, unclear, or breaks, please tell me. Your feedback on anything — the wording, the experience, a bug, an idea — genuinely shapes what gets built next. This isn't a finished product handed to you; it's something being built partly with you. One thing worth knowing going in: the Tesseract is a mirror, not an oracle. It doesn't predict or tell you what to do — it holds your intention across 26 independent perspectives and shows you where your own thinking converges, and where it doesn't. Read the "How it works" page before your first run — it takes two minutes and will make your one free report meaningfully better.
5d •
New to Claude? Start here.
🎁 I've put together a step-by-step beginner tutorial (PDF attached below) that walks you through everything I wish someone had shown me on day one: ✅ The one settings switch that unlocks everything else ✅ How to build and publish your own website — no coding, just conversation ✅ How to make Claude create custom Skills for itself (this one changes everything) ✅ Setting up British English mode — written and spoken No jargon. Just follow the checklist on the last page and you'll be building within an hour. 🎟️ AND — I'm giving away ONE voucher for a free week of Claude Pro, which unlocks Claude Code (the tool I use to build everything you see here). To enter: download the PDF, try one thing from it, and comment below with what you built or set up. I'll pick the winner in 7 days. The tools are simple. What you point them at is what matters. 🔺 Gere is free trial for a week if you resonate https://claude.ai/referral/id9qoBQFqQ?s=android
1-30 of 139
powered by
skool.com/allistar-center-4289
This is the Metafusion community blending Technology with Consciousness, Science with Metaphysics. We connect what seems to be polarity into one idea.
Suggested communities
Powered by