Activity
Mon
Wed
Fri
Sun
Mar
Apr
May
Jun
Jul
Aug
Sep
Oct
Nov
Dec
Jan
Feb
What is this?
Less
More
Memberships
Etsy Mentor
3.3k members • $1/m
Peaceful Birth Academy
1.8k members • Free
Pinterest Skool
1.8k members • Free
The Directory On Skool
193 members • Free
Wilder Profits | Mom's Edition
179 members • Free
Balanced and Blessed
43 members • Free
Rooted to Rise in Faith Moms
55 members • Free
The Pennywise Pantry
6 members • Free
The You World Order
224 members • Free
5 contributions to The Pennywise Pantry

🔥
1d •
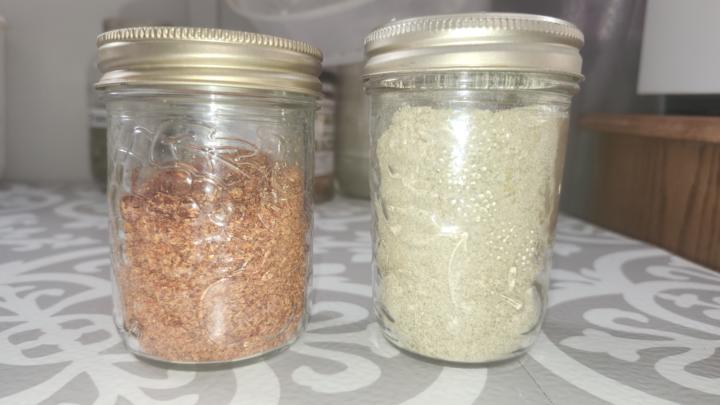
Home made tomato and onion powder
Just a picture of some tomato powder on the left and onion powder on the right. We made these with dehydrated tomato skins, and dehydrated green onions. All we did was dehydrate each item and then run it through our blender to turn it into a powder.

1 like • 8h
@Roy Houston We do have a dehydrator, I may give this a try with my extra tomatoes at the end of the season this year.
1 like • 8h
@Roy Houston Interesting. Can you use the whole tomato for powder? I typically don't remove the skins when I make tomato sauce.
🔥
8d •
Easy Peasy Squeezy Cheese
I call this Easy Peasy Squeezy (or spreadable) Cheese If you're a cheese lover, this simple, basic, 2 ingredient cheese recipe will be a hit for sure. It's a flexible and affordable option to those expensive store-bought brands. To get started, you'll need a few tools: Cheesecloth or lint-free cotton cloth 1 medium to large-sized strainer/sieve 1 large pot capable of holding 1 Gallon / 4L of liquid 1 large bowl capable of the same capacity as the pot. 1 wooden spoon for stirring A thermometer capable of at least 150 Deg Fahrenheit, a candy thermometer is ideal for this. A 3/4 cup measuring cup 4 wooden or plastic clothespins Jars for saving the whey For ingredients you'll need: 1 Gallon / 4L Jug of 3.25% milk or raw milk 3/4 cup 5% white vinegar. Your choice of herbs and spices. To make the cheese, follow these seven steps: Step 1 – Place the large pot and milk on the stove & bring slowly to a temperature of 120 degrees Fahrenheit, use low to medium heat. Stir constantly to avoid scorching milk. Step 2 – When milk has reached 120 Degrees Fahrenheit, remove from heat. Step 3 – Gently stir in 3/4 cup of 5% white vinegar. Let it sit for 30 minutes off the burner. Step 4 – Place a strainer or sieve in/over a large bowl and place a lint free cotton cloth, or cheesecloth in the strainer or sieve and hold in place with clothespins. Step 5 – Strain pot contents through the cloth/cheese cloth and strainer to separate whey from curds. Step 6 – Let the mixture sit until the whey stops dripping from the sieve/strainer. Bonus Whey tips at the end of the recipe. For thicker or firmer cheese, you can squeeze out more whey by hand. Step 7- When your cheese reaches the consistency or firmness you want, place it in a smaller bowl and mix in herbs and spices to taste. Let it stand in the refrigerator for 24 hours for the best flavor. Bonus tip: Save the whey! You can use the whey: - In pancakes - In soups - You can water your plants with it - If done with raw whole milk, you can try reheating the whey, add more vinegar, & repeat for more cheese! -
1 like • 9h
I've made this before! I like adding an herb blend and eating it on crackers.
🔥
8d •
Quick question...
Do you know what the most misunderstood thing about food is? Pick a poll option, then let me know what you think it is. I'll post the answer on Saturday if nobody gets it...
Poll
4 members have voted
1 like • 9h
@Roy Houston Yes that's an unfortunate misconception. Around here we have a discount store where we can buy out-of-date food and most of it is totally fine!
🔥
8d •
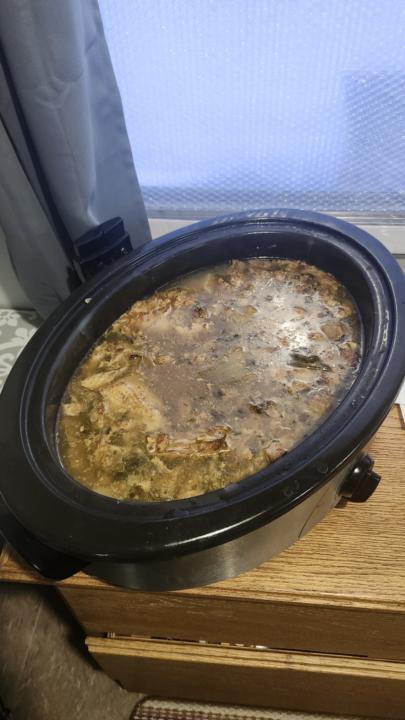
Bone Broth Quick Guide.
A while ago I posted a picture of some bone broth we had in the works. This morning I thought I would share a quick step by step on how to make it. First, in order to make bone broth, you'll need bones. Chicken bones, Beef bones, Deer Bones, doesn't matter. What does matter is that they have a) not been chewed on by whoever ate the meat. b) they haven't been from a dish that had a seasoning sauce used. A few dry spices is ok, but sauces tend to impart a strong flavor to the broth. This unwanted flavor limits what you can do with said broth. Next, for extra nutrition, you'll want to add some vegetables. We usually add some chopped onion, some chopped celery, and diced carrots. Toss in a couple bay leaves, and approximately 2 ounces of vinegar. As the broth does its cooking thing, most of the vitamins and minerals from the vegetables will cook out and stay in your broth. Next you'll need a large electric roaster or slow cooker with temperature control. put your bones, veggies, and bay leaves in the roaster or slow cooker and cover with water. Add the 2 ounces of vinegar. Set the roaster or slow cooker to 200 - 250 deg F and let it cook/simmer for 24 hours. ** Note** depending on what type of bones you've used, this cooking period may have a portion of time where the mixture has an odd smell... this is normal and it will go away as the bones cook down. Trust me, as it cooks it'll start to smell so so good. After the 24 hours has passed, turn the heat off and let the broth cool to room temperature. Strain the bones, veggies, and bay leaf mixture to remove the broth. You can toss this once the broth is removed, it's not worth keeping. You're done! If you plan on using the broth right away you can put it into jars and store in the refrigerator. For longer storage, you'll want to preserve it using a pressure canning method or freeze it. Should you choose to freeze it, remember to leave some space in the container to account for expansion as the broth get solid.
1 like • 9h
I love making my own bone broth as I feel it's so much more nutritious! But I don't enjoy smelling it while it simmers. 😔
🔥
9d •
Introduce yourself here.
This pinned post if for members to introduce themselves. Not sure what to say? Here are a few ideas... - Your name, where you are from in general, and your favourite type of food? - Your name, 3 of your favorite deserts? What do you hope to learn here? - Your name and a food-related challenge you are having and would like help with. I'll go first... My name is Roy, I'm a single food-loving and money-saving parent of one awesome young man. I enjoy experimenting with food and creating affordable recipes to share. Who's next?

1 like • 9h
I'm Abigail, a busy mama who loves to cook but cooking usually looks like a 2-year-old dumping ingredients on the counter or taking bites of food while I bounce a baby on my hip... looking forward to learning money saving tips and particularly, how to efficiently use up what's in my pantry and freezer!
1-5 of 5

@abigail-ringger-1724
Wife, mom, self-publishing author, and printables creator.
Active 3h ago
Joined Feb 12, 2026