Activity
Mon
Wed
Fri
Sun
Mar
Apr
May
Jun
Jul
Aug
Sep
Oct
Nov
Dec
Jan
Feb
What is this?
Less
More
Owned by Roy
With Pinchpenny DIY'er, we'll learn & share ways to save money through DIY. Topics include meal prep, gardening, home repairs, budgeting, and more.
Grocery bills out of control? Join us & learn how to shop smarter, cut food waste, & save on food by much more than your monthly membership.
Memberships
7 am Club
11 members • Free
The Content Revenue Lab
572 members • Free
Pinterest Skool
1.8k members • Free
Start again On Skool (SOS)
20 members • Free
Crust & Crumb Academy
292 members • Free
The Coupon Junkies
14 members • Free
Skoolers
191.1k members • Free
Örnbäckssmedja Blacksmith
13 members • Free
𝙂𝙊𝙊𝙎𝙄𝙁𝙔 🍓🐛🦋🌈⭐️🩷
11.1k members • Free
17 contributions to The Pennywise Pantry

🔥
12h •
Freezer tips
In speaking with member @Abigail Ringger she mentioned that she wanted some tips to better manage her freezer and pantry. Rather than run the risk of a crazy long post covering both at once, I'll do quick Freezer tips in this post and will follow up with some video as soon as possible. After some thought, I've decided to share these three freezer tips... Quick Tip #1 - Whenever possible, avoid freezing items in packaging that has excess air space in it. The short explanation to this is simply that excess air space contributes to freezer burn. Freezer burn is the main cause of frozen food waste. I'll be doing a quick video on this after we do our weekly shop to show how you can do this if you don't have a vacuum sealer. Quick Tip #2 - If you aren't already doing this, use a permanent marker to write either the purchased date or the freeze date on your packages. Doing this will help with implementing what I call a FIFO system. FIFO is short for First IN, first OUT. This means the first items you froze should be the first items you use. This will help rotate your freezer stock so it doesn't sit long enough to freezer burn in the event you can't repackage it to have less airspace. Quick Tip #3 - If it's possible, separate your freezer space by item type. We use cardboard boxes. Chicken goes into one, Beef in another, Pork in yet another. Doing this will help find items based on the date you wrote on the package more easily. If you want porkchops, for example, look in the pork box and take the porkchops with the oldest date on them to thaw for your meal. We have multiple freezers here so this is not something we currently do, but have in the recent past. I hope these quick tips are helpful. You may be using one or all of them. If you have any questions or other tips you think may be helpful, I'd love to hear about them in the comments! Oh, and as a little extra, I've included a PDF of a freezer list that we use here at home for those times when we have a lot of freezer items.
🔥
0 likes • 9h
@Abigail Ringger depending on the size of your freezer, Tip # 3 can be a challenge. In smaller units it often requires layering the boxes. In that case it's usually best to try and find heavy grade boxes with handles. I've tried using plastic crates from a dollar store but i find that the plastic is too thin and eventually breaks from the cold.
🔥
0 likes • 9h
@Abigail Ringger on the topic of excel, that can actually be handy if you track the food price in a column and set it up to total the value of your freezer contents. That lets you know how much of your food budget is going in the freezer. Not sure how useful that would be but it might be an interesting statistic that can be used elsewhere.
🔥
2d •
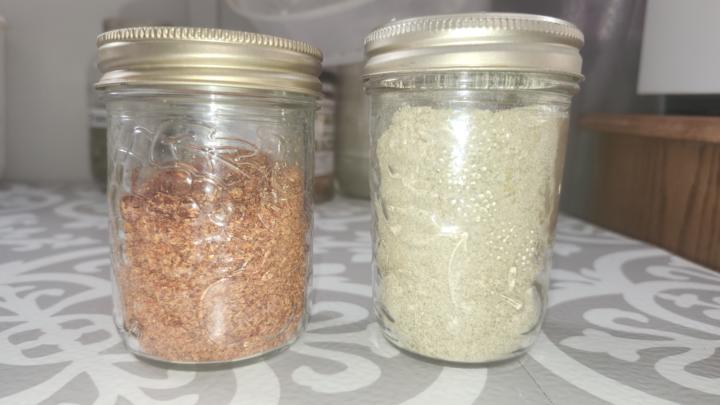
Home made tomato and onion powder
Just a picture of some tomato powder on the left and onion powder on the right. We made these with dehydrated tomato skins, and dehydrated green onions. All we did was dehydrate each item and then run it through our blender to turn it into a powder.
🔥
1 like • 19h
@Abigail Ringger we use the tomatoes for either diced tomatoes or tomato sauce and the skins for the tomato powder. It takes a LOT of tomato skins though...
🔥
1 like • 17h
@Abigail Ringger erm I suppose you could if you can dry the tomato enough, I'm just not sure how the tomato seeds will affect the flavor of the resulting powder.. We've never actually tried it using the entire tomato... Might be a good experiment... if it works it would definitely result in a lot more tomato powder...
🔥
10d •
Introduce yourself here.
This pinned post if for members to introduce themselves. Not sure what to say? Here are a few ideas... - Your name, where you are from in general, and your favourite type of food? - Your name, 3 of your favorite deserts? What do you hope to learn here? - Your name and a food-related challenge you are having and would like help with. I'll go first... My name is Roy, I'm a single food-loving and money-saving parent of one awesome young man. I enjoy experimenting with food and creating affordable recipes to share. Who's next?

🔥
1 like • 9d
@Terence Vezina Welcome to the Pantry! glad you made it!
🔥
1 like • 19h
@Abigail Ringger glad to have you with us! I'll be putting out a freezer and pantry tips post soon. I am aiming for later this afternoon but definitely by early tomorrow morning.
🔥
9d •
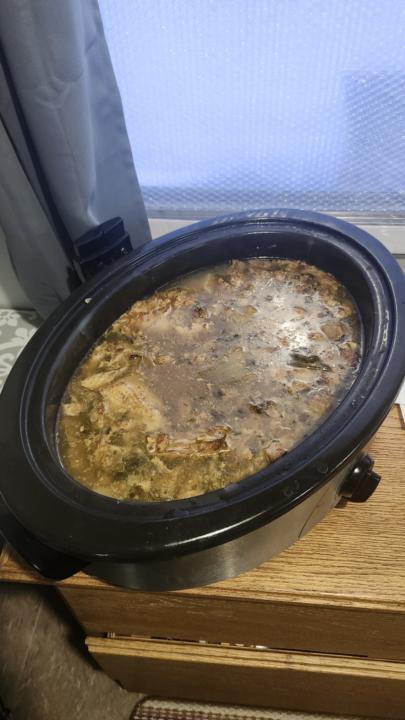
Bone Broth Quick Guide.
A while ago I posted a picture of some bone broth we had in the works. This morning I thought I would share a quick step by step on how to make it. First, in order to make bone broth, you'll need bones. Chicken bones, Beef bones, Deer Bones, doesn't matter. What does matter is that they have a) not been chewed on by whoever ate the meat. b) they haven't been from a dish that had a seasoning sauce used. A few dry spices is ok, but sauces tend to impart a strong flavor to the broth. This unwanted flavor limits what you can do with said broth. Next, for extra nutrition, you'll want to add some vegetables. We usually add some chopped onion, some chopped celery, and diced carrots. Toss in a couple bay leaves, and approximately 2 ounces of vinegar. As the broth does its cooking thing, most of the vitamins and minerals from the vegetables will cook out and stay in your broth. Next you'll need a large electric roaster or slow cooker with temperature control. put your bones, veggies, and bay leaves in the roaster or slow cooker and cover with water. Add the 2 ounces of vinegar. Set the roaster or slow cooker to 200 - 250 deg F and let it cook/simmer for 24 hours. ** Note** depending on what type of bones you've used, this cooking period may have a portion of time where the mixture has an odd smell... this is normal and it will go away as the bones cook down. Trust me, as it cooks it'll start to smell so so good. After the 24 hours has passed, turn the heat off and let the broth cool to room temperature. Strain the bones, veggies, and bay leaf mixture to remove the broth. You can toss this once the broth is removed, it's not worth keeping. You're done! If you plan on using the broth right away you can put it into jars and store in the refrigerator. For longer storage, you'll want to preserve it using a pressure canning method or freeze it. Should you choose to freeze it, remember to leave some space in the container to account for expansion as the broth get solid.
🔥
1 like • 19h
@Abigail Ringger yes, sometimes that in between smell can be over powering. I find it depends on what type of bones you are using too. Beef bones and Moose bones tend to have that odor for about 3-5 hours where you are thinking to yourself "I hope this tastes better than it smells!"
🔥
9d •
Easy Peasy Squeezy Cheese
I call this Easy Peasy Squeezy (or spreadable) Cheese If you're a cheese lover, this simple, basic, 2 ingredient cheese recipe will be a hit for sure. It's a flexible and affordable option to those expensive store-bought brands. To get started, you'll need a few tools: Cheesecloth or lint-free cotton cloth 1 medium to large-sized strainer/sieve 1 large pot capable of holding 1 Gallon / 4L of liquid 1 large bowl capable of the same capacity as the pot. 1 wooden spoon for stirring A thermometer capable of at least 150 Deg Fahrenheit, a candy thermometer is ideal for this. A 3/4 cup measuring cup 4 wooden or plastic clothespins Jars for saving the whey For ingredients you'll need: 1 Gallon / 4L Jug of 3.25% milk or raw milk 3/4 cup 5% white vinegar. Your choice of herbs and spices. To make the cheese, follow these seven steps: Step 1 – Place the large pot and milk on the stove & bring slowly to a temperature of 120 degrees Fahrenheit, use low to medium heat. Stir constantly to avoid scorching milk. Step 2 – When milk has reached 120 Degrees Fahrenheit, remove from heat. Step 3 – Gently stir in 3/4 cup of 5% white vinegar. Let it sit for 30 minutes off the burner. Step 4 – Place a strainer or sieve in/over a large bowl and place a lint free cotton cloth, or cheesecloth in the strainer or sieve and hold in place with clothespins. Step 5 – Strain pot contents through the cloth/cheese cloth and strainer to separate whey from curds. Step 6 – Let the mixture sit until the whey stops dripping from the sieve/strainer. Bonus Whey tips at the end of the recipe. For thicker or firmer cheese, you can squeeze out more whey by hand. Step 7- When your cheese reaches the consistency or firmness you want, place it in a smaller bowl and mix in herbs and spices to taste. Let it stand in the refrigerator for 24 hours for the best flavor. Bonus tip: Save the whey! You can use the whey: - In pancakes - In soups - You can water your plants with it - If done with raw whole milk, you can try reheating the whey, add more vinegar, & repeat for more cheese! -
🔥
0 likes • 2d
Thought I would add, you can also mix in fruit to make a fruity spread as well
🔥
1 like • 19h
@Abigail Ringger that's what we do here, or we put it on toast or when we get them on sale everything bagels...
1-10 of 17
🔥
@roy-houston-3724
Just a God-fearing Gen Xer sharing hard learned DIY tips to save people time & money. Pinchpenny DIY doesn't need to be pretty; it just needs to work.
Active 17m ago
Joined Feb 3, 2026
Niton Junction