
Write something

Mar 13 •
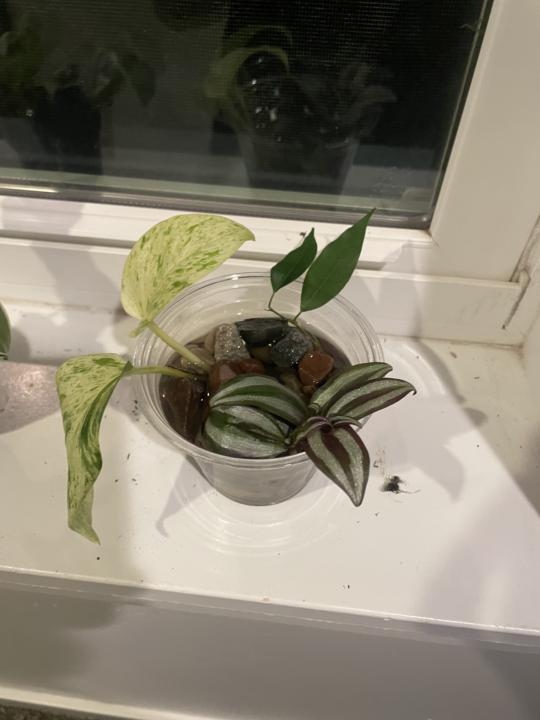
Propogation station
I have this beautiful propagation station and want to show it off. The rocks are there to support the cuttings.
2
0

Mar 12 •
Propogating a begonia from stem with rooting powder
Propagated this begonia by stem cutting !! 1. Sanitization: Always use sterilized shears to ensure a clean cut and prevent introducing pathogens to the mother plant or the cutting. 2. The Cut: Made the cut cleanly between the nodes. 3. Rooting Hormone: Applied a bit of rooting powder to the cut end to stimulate development. 4. Potting: Tucked it into a pot with pre-moistened soil (watered the soil before placing the cutting to ensure good contact). Looking forward to seeing how quickly this takes off. Has anyone else here had success with begonia propagation? Let’s see which type of propagation grows faster!! The stem cutting in soil with rooting powder or the leaf cutting in the container from previous post !!!
2
0

Mar 12 •
🌿 Begonia Leaf Propagation Experiment! 🌿
Why buy more plants when you can just make more from the one you have lol I decided to try my hand at propagating a beautiful Begonia using the leaf cutting method, and I wanted to share the process I used. Instead of letting this leaf go to waste, I’m giving it a chance to become a brand-new plant! Here is how I set up my little propagation station: • The "Greenhouse": I repurposed a clear plastic cookie container! I made sure to add drainage holes in the bottom to prevent any water from pooling and causing rot. • The Mix: I used a custom, airy substrate mix made of coco coir, perlite, and coco chunks. This blend is great because it holds onto just the right amount of moisture while staying nice and loose for those future roots. • The Technique: I didn't just lay the leaf flat; I gently bent the leaf at the main nerve/vein points to create slight tears. This signals the plant to focus its energy on growing new plantlets right at those injury sites. I also kept a short stem attached to help anchor it in the soil. Everything is now tucked away in its high-humidity container. Now, the hardest part: the waiting game! I’m so excited to see if I get some new growth soon. Has anyone else tried propagating Begonias this way? Any tips for success? #PlantPropagation #BegoniaLove #UrbanJungle #PropagatingPlants #PlantParent #DIYPlantCare
2
0

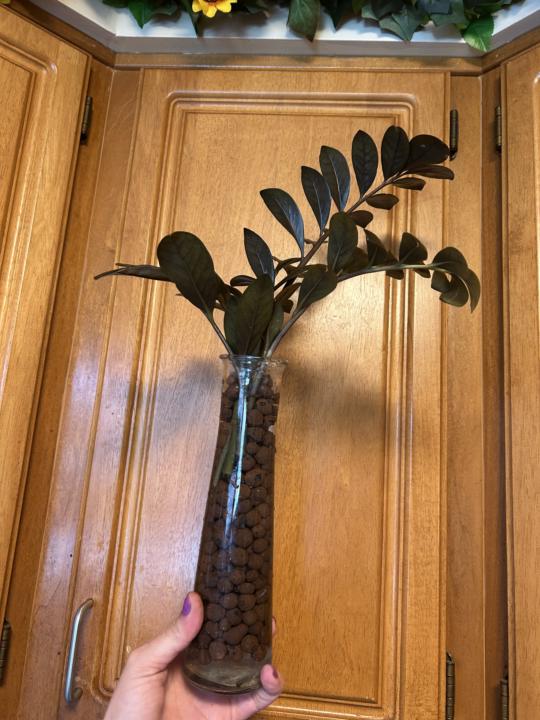
Mar 4 •
FINALLY !!!!
The wait is over! My ZZ cutting has finally calloused, so it’s officially moving into its new LECA home. Now we wait for those roots to do their thing. 🌿✨ #ZZPlant #Propagation #LECALife
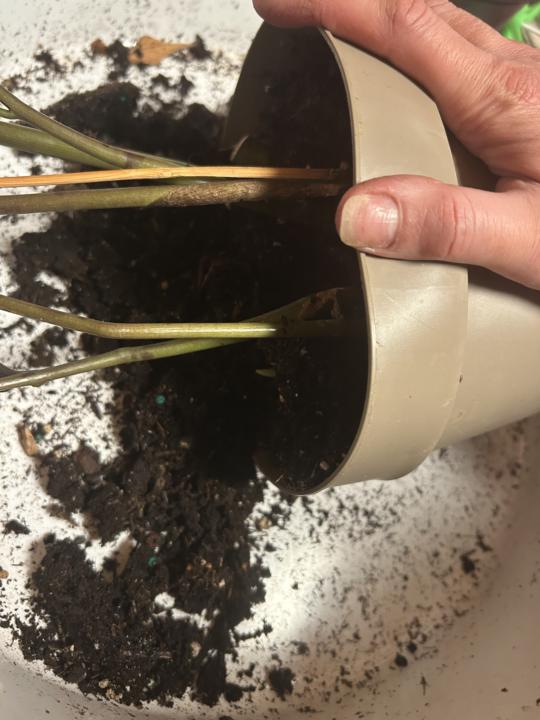
Mar 2 •
🌿 How to Propagate ZZ Plants: From Stem to New Shoot
If you want to turn one ZZ plant into many, follow these steps that I used to get 100% success with both Green and Raven ZZ varieties. Step 1: Take Your Cuttings • Stem Selection: Use a sterilized blade to cut a healthy stalk at the base. • With or Without Leaves: You can propagate from a full stem with leaves (like my Raven ZZs) or even just a leafless stem segment. Stems with leaves generally produce energy faster. Step 2: The Critical Callus Period • Dry it Out: Before putting the stems in water or soil, let them sit out for 24 hours. • Why? This allows the cut end to "callus" over, which acts as a scab to prevent the stem from rotting once it hits the moisture. Step 3: Choose Your Propagation Medium • Water Method: Place callused stems in a jar with just enough water to cover the bottom inch. Change the water every 7–10 days to keep it fresh and oxygenated. • Soil/Coir Method: Plant the stems directly into a well-draining medium like coco coir or succulent mix. Step 4: The "Potato" Phase (Rhizome Development) • Be Patient: This is the longest part! Over several weeks or months, the plant will grow rhizomes—thick, potato-like bulbs that store water. • Check Progress: In water, you can see these forming; in soil, you’ll know they are there when the stem feels firmly anchored. Step 5: The "Big Reveal" (New Growth) • New Shoots: Once the rhizome is established, a brand-new leafy stalk will eventually sprout from the soil next to your original cutting. • Transition: At this stage, ensure the plant is in a small pot with drainage holes to avoid "drowning" those new water-storing rhizomes. 👀I had one already that I propagated before and that’s what the other stems are gonna look like I’m waiting on the ones I just cut to callous to add in water
3
0
1-11 of 11
powered by
skool.com/plants-2391
A cozy, judgment-free plant community to learn, share, and grow together 🌿
Suggested communities
Powered by