
Write something

Feb 9 •
Cnc plasma cutting
Cut these European mount deer hangers today out of 14ga steel. Had a bunch of scrap on two 4x8 sheet, and ended up cutting about 50 of them. The easiest way I have found to remove the millscale and dross, if not crunched on time, is to soak in 50/50 muriatic acid and water for a few hrs. Make sure you neutralize the acid before touching, or it will burn you!
0
0


Jan 14 •
Cast Iron - No Coolant Blues 😁
Hey, can anyone give me some advice please? I need to weld a cast iron piece on an engine block, it blew up in the frost the other day and I'm confused whether it's doable or not. Thickness is 4mm. I've read about it needing a lot of pre-heating, some are putting the block in furness... etc Thanks

Jan 10 •
THANKFUL
They say the third generation is where legacies are either cemented or lost. For a decade, I was lost. I went from starving and buried in debt to physically shattered—surviving a hit-and-run and a facial reconstruction that nearly took my will to live. I was inches away from giving up on everything. Then on my birthday when I was close to my lowest point came an email and somehow among over 5thousand others I saw it an offer to join the company I’ve tried and tried and tried to be a part of to no avail and here they are reaching out to me of all people. Joining this company isn't just a career move; it is a homecoming of sorts going all the way back to the early days of the company on the very same ground back to when it was known by a different name before the multi billion dollar facilities were built the way it is now the luxurious workplace it is now I am following the footsteps of two generations before me, two generations who had all but given up on me being anything two generations that died believing I was a lost cause… but because of that I am bringing a perspective they never had to endure. I know what it’s like to have nothing, which is why I will give this everything. My dreams didn't die on that gravel road. They were forged there. To anyone who thinks I’m just lucky to be here: I didn't just get an opportunity. I survived long enough to claim it. Watch me work.
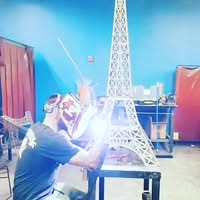
Jan 7 •
Some extra wide open root
Some extra wide open root on 15 inch coupons x.5 thick hand cut bevels withOxyfuel torch it’s a long weld good weld bad video 🤦🏻♂️ mainly bc the extremely hot piece fell. As I went to brush it clean camera lost focus but take my word for it it was slick and the toes were just dirty not undercut like they appeared and yes this is at a school that I am blessed to have access to after all these years luckily they keep their awesome and supportive instructors around to let me run amok with all the new top of the line toys
6
0

Jan 7 •
Welder fabricator grinder 🤣cameraman video editor
So all those titles at once make for a pretty lousy video but best I got on the beginning of the bench restoration for a friends veterinary office will post pics of it finished when I finish it lol anyone know what the technique with the hammer is sometimes called and what it does really well especially with thinner metal
6
0

1-30 of 39
powered by
skool.com/metallab-5911
Anything and everything welding and metal fabrication ‘
Instruction
Discussions
Information
Tips & tricks
Networking
More
Suggested communities
Powered by