12d (edited) • General discussion
Stainless TIG beginner/intermediate
- Preparation: The Most Critical Step as we learned when working with aluminum prep and cleanliness is the key to producing a successful structurally sound aesthetically pleasing weld
If your stainless steel isn't perfectly clean, your weld will be dark, weak, and "sugary" (oxidized) on the back.
• Cleanliness is Mandatory:
• Wipe the entire area around the weld joint with Acetone to remove all oils, grease, and fingerprints.
• also like aluminum Using a brush or abrasives dedicated strictly to stainless steel to clean any scale or oxide. Never use a brush that has touched carbon steel.
• Wear clean gloves to prevent transferring oils from your hands to the metal.
• this is actually pretty advanced and specific to a certain Back Purging (For full penetration welds):
• When welding pipe, tubing, or sheet metal where the back side will be exposed, you must shield the back with inert gas (usually Argon) to prevent internal oxidation (sugaring).
• Procedure: Seal the back of the joint and feed Argon gas at a very low flow rate (e.g., 5-10 CFH). This displaces oxygen and keeps the inside of the weld pristine.
2. Equipment and Setup
⚙️ Machine Settings
Polarity DCEN which is Standard for all steels.
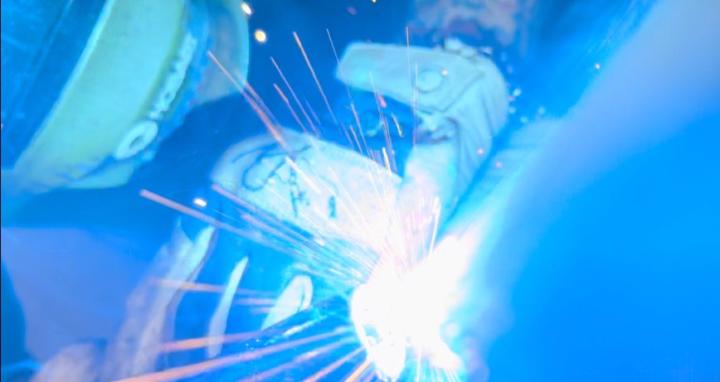
Amperage is Lower than mild steel Start around 70-80% of the amperage you would use for the same thickness of mild steel (e.g., \approx 1 amp per 0.001" of thickness, then reduce). Use a foot pedal to manage heat dynamically.shielding gas used for stainless is 100% Argon and you’re going to Set the flow rate higher than you would for mild steel, generally 20-25 CFH (Cubic Feet per Hour) at the torch. Use a Gas Lens for superior gas coverage this is where your #10+ cup sizes are best utilized for larger areas of gas coverage make sure to set your post flow for a higher amount of time somewhere in the 5-15 second range depending on the heat put into the weld this is because the shielding gas must flow after the arc stops to protect the hot, cooling tungsten and weld puddle from atmospheric contamination. All though there’s different tungsten’s you can use for stainless I prefer the thoriated tungsten (red) which IS slightly RADIOACTIVE after its been used so accepted alternatives are 2% Lanthinated (blue) or 2% ceriated (grey) they offer great arc stability and arc starts when using D/C current and you’re going to want the tip to be sharpened to long clean fine point lengthways on a wheel dedicated to sharpening tungsten to prevent cross contamination of your tungsten and your filler is commonly going to be ER308L the L stands for low carbon which resists corrosion and is used when welding 304/304L although other filler rod types are available and potentially required depending on the specific application and base metal type this is just the most commonly used and you always want your filler to be smaller than the thickness of the base material when welding thin stainless this is especially important for example if welding sheet stainless you would use a 1/16 th filler or even an .040 filler rod
The Welding Technique
Probably The part we all have been waiting for hahah
When welding stainless steel
The main goal is to weld quickly and consistently while keeping the heat input as low as possible to prevent warping, discoloration and preventing a large HAZ
1. Arc Start: Start the arc by tapping the pedal quickly. Begin with just enough amperage to form a small, bright puddle.
2. Torch Angle: Use a slight push angle, about 5-10 degrees off vertical. This is a bit more upright than for mild steel, helping keep the arc focused and 5”it also prevents arc wandering.
3. Arc Length: Keep the arc length as tight as possible (approx. 1/16" or less). A long arc causes excessive heat, tungsten degradation, and poor gas coverage.
4. Dab & Move:
• Once the puddle forms, move the torch slightly to the joint's edge.
• Dip your filler rod into the front edge of the puddle.
• Withdraw the filler rod, keep the tungsten still for a moment to solidify the puddle, then move the torch forward over the solidified bead.
• Cadence: Maintain a smooth, consistent rhythm of Move, Dab, Move, Dab. Avoid lingering in one spot too long
5. Heat Control: Use your foot pedal to back off the heat as the stainless gets hotter (which it will do quickly). A steady puddle should have a shiny, liquid look. If it turns dull or cloudy, you are moving too slowly or have contamination. A heat sink is ideal this can be clamping a thick piece of aluminum to the base metal near the weld joint aluminum is great for this due to its amazing conductivity of not only electricity but also of heat it will pull the heat from your stainless steel base metal as you weld it
6. Weld Finish: Feather the amperage down slowly with the foot pedal (don't lift your foot abruptly) and allow the post-flow gas to fully cool the weld and tungsten. Do not lift the torch early!
4. Quality Check: Color Grading
The color of your finished weld is the best indicator of proper shielding and heat control. The goal is to see bright, light colors like golden straw color or ideally shiny shiny silver these are great indicators that your gas coverage and heat input are optimal here a break down
Chrome / shiny silver means perfect gas coverage and heat input this is the ideal color we aim to achieve
Golden straw means very low oxidation and is good
Light blue isn’t ideal but acceptable this means there is moderate in heat input and oxidation present
dark blue and purple while pretty are key indicators of too much heat input or not enough shielding gas coverage and causes a high potential for reduced corrosion resistance and is best avoided
Grey/black/sugary bead means severe oxidation and contamination and is considered a Failure and it (Must be cleaned and re-welded)any other information on this you want to know just comment on this post or DM me with questions regarding tig welding stainless I’ll go over the back purging method in detail in another post
3
0 comments
Stainless TIG beginner/intermediate