Activity
Mon
Wed
Fri
Sun
Apr
May
Jun
Jul
Aug
Sep
Oct
Nov
Dec
Jan
Feb
Mar
What is this?
Less
More
Memberships
Headlight Restoration School
371 members • Free
Medical Courier Community
24.7k members • Free
74 contributions to Headlight Restoration School

5h •
Worst I've ever done
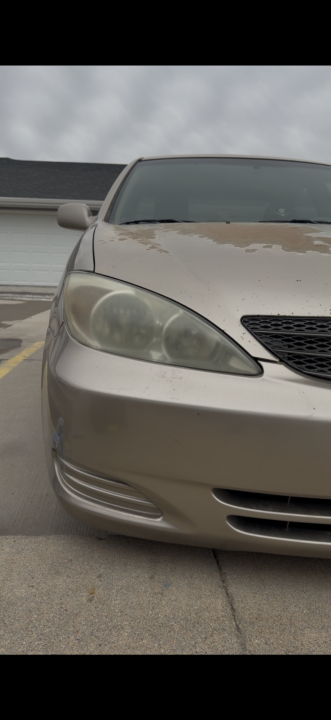
So this one I did only as a challenge to me. I wanted to see how bad, " bad" really is. I think he used a 1k or 2k spray . The coating was so thick. He then tried to sand down the driver side giving up on that. Basically he felt it was unrepairable. I wanted to see what I can do. Took me three hours. Driver side I had to start with 180. Passenger side started with a 120. Using the headlight magic UV clear , I got these results


0 likes • 1h
Damn. Turned out really nice !

9h •
My first restoration🙌
I used the Cerakote Ceramic kit from Walmart as an intro to headlight restoration and got this awesome result! A neighbor asked for his to be restored as I was finishing this one, I’ll post his next!
1 like • 8h
Nice job !
1 like • 6h
@Fernando Villanueva Thanks. I use Chatgbt.

20h •
Saving Factory UV coating ($150 for 10Mins)
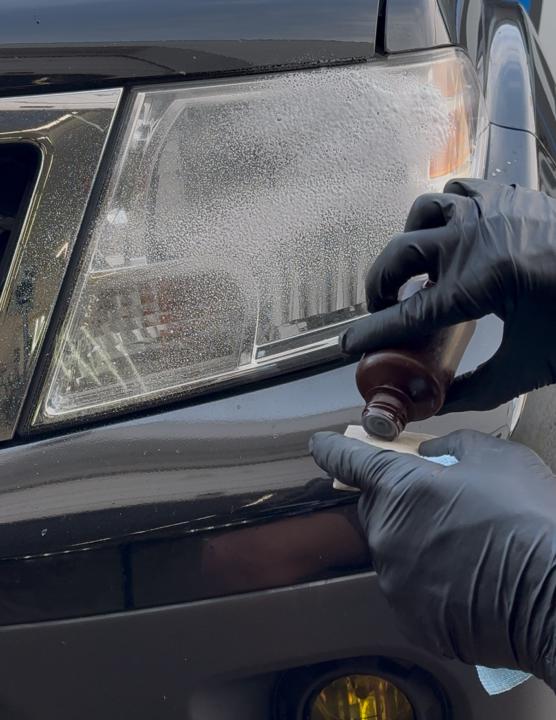
I know that most of the time we are fixing lights that are already faded and we are sanding and then adding new UV protection There are also ways you can earn income off of life that are not faded and lies that are just now starting to fade Like the example I will give you here. •••• I did one of these yesterday that was a 2017 GMC 1500(Denali) and then a Nissan frontier today. I did the same process on both. 1. Clean any bugs and dirt off the light 2. Lens prep(oxidation remover) 3. Tape it up.(make big deal of this process. Show you’re taking care of their vehicle) 4.apply the polish to the light(PlastX, 3D ONE, Koch Chemie with purple neck or your favorite one) 5. I use a wool pad for the first pass but you can use a heavy cut pad too. 6. use polish pad. I use the blue Headlight Magic pad. After this, clean the light off to see if it’s good to go or if you need to do one more pass of the heavy cut pad and polish pad like I did in both instances. 7. Remove the tape and clean up area. 8. One final wipe down with a clean/fresh microfiber towel. Use either panel prep/isopropyl alcohol/sprayway 9. Apply the New Car Ceramic or something like Mckees 37 Graphene Headlight Coating 10. Take your final Before/after pics and or video and get paid. This is a VERY similar conversation as if they were already faded fully. You’re touching on how much the lights are to replace. How once they’re fully faded they’ll start to have safety issues. And “let’s get this thing BACK to looking as amazing as you know it can/how it was when it was new” I know for myself, a lot of times I don’t even notice these as the faded ones are TOP OF MIND since they’re obvious. But EVERY. SINGLE. VEHICLE is a potential person you can help and a potential client you can serve. ••• The photos should be in order of the steps as well btw. I’ll Add the payment screenshot in the comments. I didn’t charge this guy the 3.5% so it brought it down to $147 but I’m not complaining for literally less than 20 mins
0 likes • 11h
Looks great Andrew !

1d •
what do you think
I was messing around and ended up really liking this design lol what y'all think?

0 likes • 23h
Looks great !
1 like • 23h
Nice job !
1-10 of 74
@mike-howard-9679
Mike from Ohio. Looking to start a headlight restoration business.
Active 3m ago
Joined Nov 15, 2025
New Carlisle, Ohio
Powered by