Activity
Mon
Wed
Fri
Sun
Aug
Sep
Oct
Nov
Dec
Jan
Feb
Mar
Apr
May
Jun
Jul
What is this?
Less
More
Owned by Evan
From first sales to six figures. A place for gardeners of all shapes and sizes to sharpen profitability, people, and production on their small farms.
Memberships
Small-Scale Rebellion
891 members • Free
Free Skool Course
71.5k members • $1
Skoolers
166.3k members • Free
5 contributions to Market Gardeners Guild

Feb 28 •
Post in the Market Gardeners Guild
Feel free to post about any of the following in regards to what's working or not working in your gardens: 1️⃣ Production: Crop plans, yields, spacing, tools, workflow, pest issues. What’s actually happening in the field? 2️⃣ Business: Pricing, revenue, labor efficiency, $/bed, scaling decisions. We invite folks to share real numbers whenever possible. 3️⃣ Strategy: Share challenges with context (scale, market, climate), where to start selling, how to start selling, share any big wins!
0 likes • Mar 1
Very nice looking share! I hope to include berries and other fruit in ours when our bushes/trees are ready. Still a couple years out! What was your CSA structure? How many shares per season and how much value was in each share week to week?
Feb 20 •
Spring Prep
Spring is just around the corner. What are you doing now to get ready for the coming gardening season? Do you currently have anything in the ground? We're in Zone 5B so it's still pretty cold here. But here is some of what I have done on my 1/2 acre operation so far: 1. Sales-wise, we opened up our CSA for new members - we're about 60% full with 27 members, aiming for 40 this year. We continue to sell a dwindling amount of storage roots (only about 100# of purple daikon radishes left!) 2. I purchased a new walk in cooler to store our fresh produce for during the season and hauled it to our site. 3. We moved our greenhouses to a different plot due to some flooding issues in the previous location. The bows are up, now we need to finish the hardware and get the plastic up. 4. We seeded our first seeds of the season into plug trays - onions, shallots, and parsley; next we'll do a lot of greens, beets, first sowing of carrots, and more! 5. Spruced up our raised reds by pulling out dead debris, topping off with compost, a sprinkle of composted chicken manure. Before planting we'll add a little fresh potting soil in order to prevent weeds from sprouting. We have garlic and strawberries in the ground as well as our usual perennials; chives, sage, rosemary (sometimes), thyme, rhubarb, blackberries, raspberries, aronia berries, Goji berry, Josta berry, blueberries,. currants, apple trees, pear trees, persimmon tree, and a peach tree!
Jan 25 •
New Members
We've gotten some new members! Let me know what you're #1 takeaway from this past season was and what are you most keen in learning about in this community? My #1 takeaway was that less is more. I scaled down my farm this season and ended up being MORE productive and profitable than any year in the past. I'm keen to learn from others about growing in other zones Mostly eager to learn about what you all are struggling with so we can steer this community towards acheiving more productive and profitable gardens/farms! I'm working on building out classroom content that I think you'll all really dig. Stay tuned :)
0 likes • Jan 27
I love your willingness to experiment. Growing food and plants requires experimentation in order to really know your soil. What kind of soil are you working with and what specifically didn't work? I think utilizing the plants that grow easily there is a wise place to start, any roots in the soil will feed the soil microbes and improve its structure. Unfortunately, when starting with poor soil you're either going to have to repair the soil by way of organic matter with time (cover cropping/running livestock) or money (amendments) In my experience, cover cropping is great, but can take time to work its magic, like you said. When I moved onto my new property, I needed it to start producing income for me fairly quickly. Luckily, the soil was in ok shape to start but utilizing amendments REALLY fast tracked my ability to grow healthy crops quickly. I put down a large amount of compost and an organic composted chicken manure product from Ohio Earth Food that is 5-3-2 and provides trace minerals as well. This year, after doing a soil test, I learned that the soil is actually not going to need any additional amendments. So it might cost money on the front end, but it will pay dividends down the road. Have you gotten soil tests done? This can help you target what exactly you need and how much so you don't waste any money that you don't need to. I've been hesitant to do these routinely in years past but find that they pay for themselves in the long run.
1 like • Feb 13
Raised beds are great for avoiding native soil fertility issues. They also are aesthetically pleasing and help delineate crops from walking paths, etc. Your pictures look great, I love the use of lights on the arches! I had an area of my property with a lot of gravel in the soil from a previous building being located there. So, naturally, it was a great spot for raised beds.
Dec '25 •
2025 Garden in Review
Post a photo of your garden from the past season! What was your tastiest success and most gut-wrenching failure?
1 like • Dec '25
@Deborah Wyatt Dang, what a great harvest! I'm in the midwest and have two VERY young lemon trees I'm excited for them to produce but because... well... winter, I don't think I'll see anything like this! Any tips? What did you fertilize with? And do you happen to know the variety?
1 like • Dec '25
@Deborah Wyatt Great info here! Thanks so much for sharing :) I wish I could grow all those different types of tropical fruit! Hope the next season goes as well as this one!

Dec '25 •
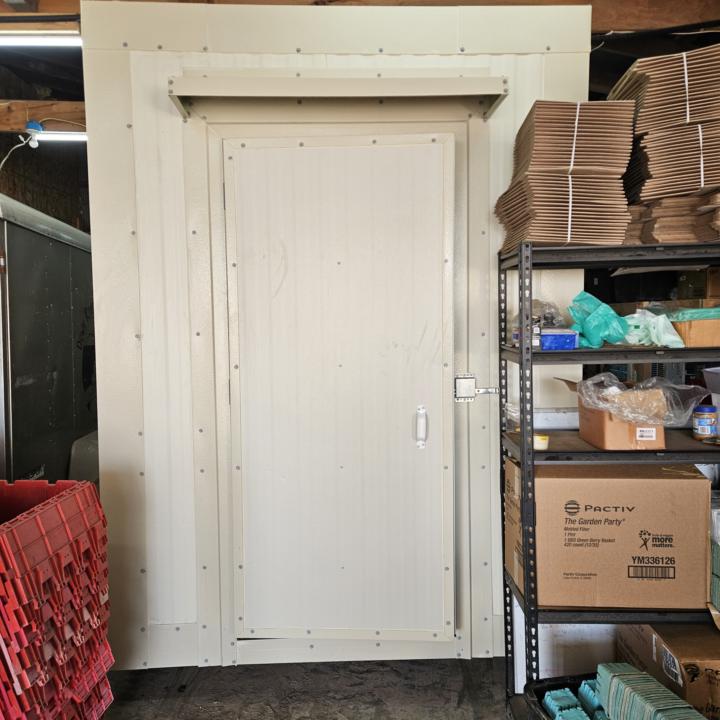
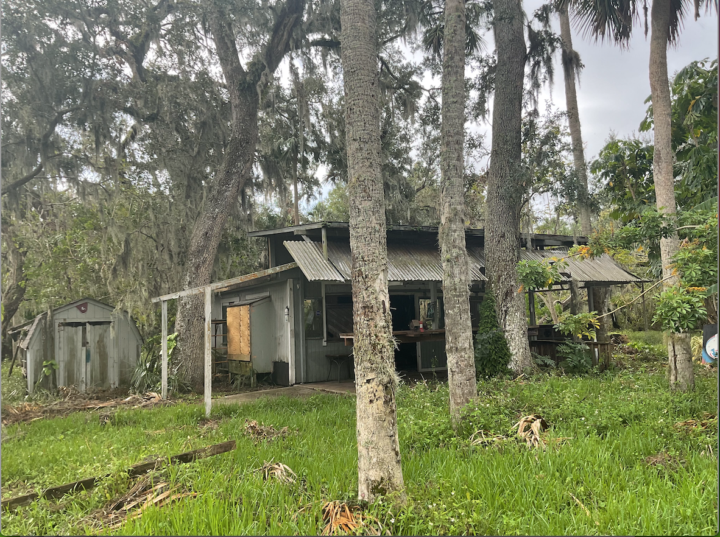
Irrigation Help
Hi everyone! I'm facing a huge challenge, but I'm excited about the payoff. I recently moved from a 51-acre farm in Kentucky with forty-two 4'x50' raised beds down to a very productive 1.29-acre lot in Florida. (We just missed family and had to move back.) Space is now my biggest constraint, so my new motto is: Grow Up! My current indoor grow space is... unconventional. It's a former enclosed porch on an outbuilding (which will eventually be my workshop/classroom) I've converted into a greenhouse. I'm being kind—it was previously the infamous local biker hangout, The Bada Bing Club! (Please don't judge the history; I'm doing my best with what I have! 😉) Inside, I'm maximizing vertical space using ClosetMaid shelving, which was a generous gift. Here's my immediate logistical nightmare: I don't live on the property yet. My sister and I are in a rental until our house is built here. It is a royal pain to drive over every other day just to water everything by hand. I need to make this system self-sufficient. I am an irrigation beginner and need a reliable system that can handle all my unique needs. I need a fully automated, solar-powered watering system. Currently, there is no electricity running to the outbuilding or the pots outside, so solar power is the only way to go. Here's the technical setup I'm trying to water: 1. Indoor Greenhouse Shelving: I need emitters or misters running to plants on the ClosetMaid shelves. 2. Indoor Hanging Baskets: I need emitters or misters dropping down from the ceiling to water plants hanging above. 3. Outdoor Potted Plants: I have about 15 large pots outside the greenhouse that need their own irrigation line. I'm open to a system where I turn the water on manually, but the ideal solution would be 100% fully automated (timer-controlled). Does anyone have experience installing or recommending a solar-powered irrigation system for multiple zones (shelves/pots/hanging baskets)? Any advice on component names or specific kits would be a lifesaver!
0 likes • Dec '25
This is a great question and congrats on getting a new piece of land! This is a unique challenge but what I might recommend is making it so that you need the least amount of irrigation runs as possible. If you can get all the plug trays and hanging baskets to be on an even plane, you can water them all with one run of misters. With them being on that type of shelving system, it would be very difficult to water those accurately with an automated system. I used to have that same closet racking system in my propagation house and it made GREAT vertical use of the space, it also required me to water manually with a watering wand in order to ensure proper watering. It also will kind of depend on how much pressure your water source gets as well. Certain systems need certain pressure in order to run properly and not blowout. Here's my recommendation which can be modified based on your budget: 1. Get this timer and plug it into your water source. These timers run on a couple AA's and should last a year so this might be easier than a solar one (which are a lot harder to find). Also, you can spend more on a timer if you want one that might be more reliable/durable. Depends on your budget. 2. This is a complete kit that will give you what you need in terms of emitters for hanging plants (the drippers) as well as the streamers for larger potted plants (depending on how large the pots/hanging plants are). You can run main lines from the timer to the base of the greenhouse, then up the posts and run them horizontally along the edges of the roof (above the hanging plants and trays). 3. Then you can make vertical runs of main line down the side of the racking, with these emitters facing towards the wall of greenhouse (so you're not getting the rest of your space wet). Those emitters are installed in the same way as the others in the kit so other than purchasing the emitters themselves you wouldn't have to add anything additional. 4. Step #3 Caveat and Personal recommendation: When automating watering trays on racks like those, you will get more even watering if you are able to set them on an even plane and then just have a single header line attached to the roof above them with emitters. You'll likely get better results. Less trays/cells drying out due to uneven watering. So it looks like they're might be enough space to set them all on a single level of racking and then just have the header run directly above them and use these types of hanging emitters. They would hang right of the line of trays and provide really even, nice coverage. These emitters need to be spaced every 3', so you'll need to measure the length to accurately calculate and purchase the amount you need.
1-5 of 5

@evan-barry-7532
Microfarmer + garden designer helping people grow more food with less time, space, and stress. A decade of professional vegetable growing experience.
Active 2d ago
Joined Aug 22, 2025
Illinois