Activity
Mon
Wed
Fri
Sun
Jul
Aug
Sep
Oct
Nov
Dec
Jan
Feb
Mar
Apr
May
What is this?
Less
More
Memberships
AI Video Academy
447 members • $9/month
AI Visual Academy
157 members • Free
AI n8n Automation Collective
2.8k members • Free
n8n KI Agenten
10.7k members • Free
YUP!
723 members • Free
ArtFx Videography Community
8.8k members • Free
Six-Figure Graphic Designers
1.2k members • Free
AI Automation Society
390.6k members • Free
[Archived] KubeCraft (Free)
11.2k members • Free
1 contribution to ArtFx Videography Community

Jul '25 •
No GateKeeping Series Day 1
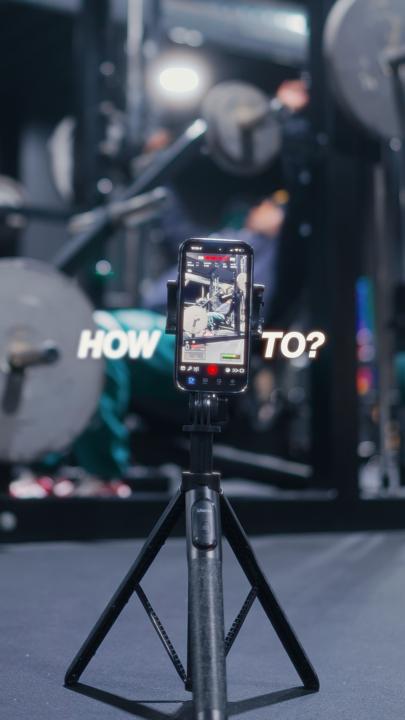
Hey Family, I've been working on a long awaited series that I firmly believe will help you out so much in your videography/ content creation journey. So today, this is Day 1 of my " No Gatekeeping Series " where I break down all the tricks, tools, and hidden gems I use to level up my content so you can do the same. Today, I'm breaking one of the biggest pain points most people face when filming with their iPhones. So f you’ve been filming on your iPhone and wondering, “Why doesn’t my footage look like those dreamy cinematic edits I see online?” — this is for you. I've also added my iPhone cinematic LUT which I usually charge for but we not gatekeeping no more so I'll be giving it out for free. So... What you’re missing isn’t gear — it’s settings and sauce. Let’s lock in your camera settings. 📱 iPhone Native Settings: - Go to your Settings app - Scroll down to Camera - Tap Record Video → set it to 4K at 30fps (this is the sweet spot for most content) - Next, go to Formats → choose Most Compatible 🎥 Using the Blackmagic Camera App (aka the app I use 99% of the time because it gives me full control): - Open the app → tap Settings - Set Resolution to 4K (NOT UHD — trust me, it makes a difference) - If your iPhone supports Log format, use that for maximum dynamic range. - If you shoot for social (Reels, TikToks, Shorts), turn ON Vertical Video Mode - Last thing — enable Mirror Front Camera Now here’s the before vs after using these exact settings — and yeah, that glow-up is real. But here’s the part most people won’t tell you: Settings alone aren’t enough. You still need that color sauce to make it pop — and that’s where my iPhone LUT comes in. I designed this LUT to turn flat-looking iPhone footage into cinematic, rich, scroll-stopping visuals — even if you’re filming in your bedroom with no fancy gear. It’s not just a preset. It’s a cheat code. And because I want to see more of us winning — Comment “settings” and I’ll send you the step-by-step guide plus my LUT, completely free.

1 like • Nov '25
Settings
1-1 of 1